Wednesday, March 26, 2008

Stickers!

We're beginning to look almost like a real business here at Sugar Plum Delights. In preparation for Spring markets and festivals, I decided that we needed a bit more of a "presence" you might say. So, I whipped up those clippy cards that I posted about a little while ago, made some matching hang tags to add to tutus, bibs, and whatever else we have, all to look a little more uniform. Then I started thinking, well people are going to need to have bags to take away their many purchases from our booth, and what good is giving them a bag with no business identification on it? We want other people to see where our customers are getting their great products. So, I picked up a Xyron 510 at Michaels (using a 40% off coupon, of course), played around on PrintMaster, and....Voila!

It's our very own sticker! I slapped this on some nice white shopping bags and now we look professional. It would have been better if my circle cutter would have cooperated, but I'm still working on that.

The Xyron machine is really cool, I can't believe I waited so long to get one. If only I had known that I could put anything in there and make it into a sticker, I would have had one years ago. I'm still playing around with it to see what all I can do, but I hear you can actually put fabric in there. I 'm not sure what I would do with sticky fabric, but you better believe I'll find a way to use it!

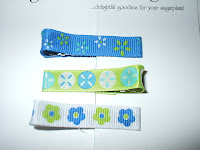
I also whipped up some cute new clippies in the last few days. They're available in the shop now!


On a personal note, we're still recovering from the crud here at Sugar Plum Central, but I hope everyone out there is feeling well!

Saturday, March 22, 2008

Keychains Galore!

This embroidery thing is pretty cool. I've been playing with my machine and learning more about it every chance I get. I still haven't figured out the whole stabilizer and what to use when, but that may take a while. I also have this software that seems complicated, but everyone says it's the best on the market. Whatever! I want point and click interaction here. But, I'm learning, and in the meantime I can at least monogram! Okay maybe not monogram in the guest towel monogram sort of way, but I'm getting there. Tonight, I produced these lovely objects:


Aren't they cute? I was pretty impressed with myself, I have to admit. My husband said I should have spelled out "ASK" in the picture, but I wanted the pink one in the middle. Anyway, I'll be listing them in the shop this evening. Customers will be able to choose the color of the webbing and the font. I better order more webbing, I'm running low. Yikes! The colors I currently have are fuschia (limited), pink, red, black, turquoise and brown. Font choices are Curlz, Girls Are Weird (the fuschia one), and Tina (red). I'm working on getting more. I LOVE fonts, almost as much as I love fabric, so you can bet I'll have a ton of choices!

Tuesday, March 18, 2008

She's Crafty...

Ta Da! Welcome to Shannon's First-Ever Tutorial! I was browsing around sewforum.com today and saw a very nicely done version of a placemat purse that I had never seen before. The person who posted her pictures didn't post how she did it, so we (me and a few others on the board) decided that we could just figure it out. And we did! I was at work all day, so I started playing around with a piece of paper, and ended up with a very nice office paper purse, complete with staples. I'll have to post that picture, just because it's funny. Anyway, I have a ton of placemats lying around just waiting to be made into bags, so I got home and after putting my neanderthal/toddler to bed, I started to play with a real placemat. And this is what happened:


Alternative Placemat Purse Tutorial
(better name is pending - I'm open to suggestion!)


1. Start with your standard placemat. This one is 13” x 19”.


2. Fold in half lengthwise.


3. Rotate


4. Fold bottom up until you have the desired size of your bag. Pin and sew all the way around (you don’t have to do the bottom unless you want a top-stitched look). Make sure you use a heavy duty needle or a walking foot, depending on the weight of your placemat. This one is heavily interfaced, so it was pretty thick at the corners.


5. After sewing, you’ll have two pockets on the inside. It’s magic! Feel free to attach any closure at this point; snaps, Velcro, ribbon, whatever. I didn’t attach a strap to this one as I didn’t have any cord on hand, but I would attach it here.


6. And, voila! The almost finished placemat wallet/purse. This is relatively small, so I envision it to be used as a wallet while traveling, shopping, clubbing, any time you don’t want a large clunky bag with you. Great for moms! I didn’t permanently attach the ribbon, since I’m not sure if I’ll stick with it or not. I may embroider it.

Variation: I didn’t add any depth to the bag, but here’s what you can do:
1. Flip bag inside out
2. Cut about a 1-inch notch out of each corner at the bottom of the bag (I hope you can visualize this..Word won't let me copy the cute little graphic I drew)
3. After cutting, smoosh corners together and sew across the smoosh on both corners. I’m sorry, but I don’t have a picture to illustrate this, and my drawing skills are limited. If you have any questions please ask!
4. Flip bag right side out, and now you have a little depth to your bag!

There you have it! If you have any questions, please don't hesitate to ask, and I'll do my best to help you. Special thanks to tzb123 on sewforum for my "A ha!" moment! I'll be sure to post pictures of the bag when I do get it completed with strap and embellishment. This should give you the basic idea, though! Go on! Be creative!

Monday, March 17, 2008

I'm not Irish, but...

Okay I might have a tiny smidgeon on Irish in me somewhere, but it's not a major part. I have been told that I look Irish, though, so that should count for something. My name is Shannon, I have reddish-blonde hair and fair skin. That's enough for me! I've even been to Ireland, and I'm wearing the shirt today to prove it. Anyway, have a pint of green beer, and celebrate Ireland!

Embroidery Update: The machine is out of the box, so lookout! I'm still figuring out how the machine works and learning more about the technical aspect of embroidering, but soon, very soon, I'll have fresh new embroidered products! I have so many ideas going through my head it's hard to sleep. I know I say this after every post, but stay tuned! :)

Wednesday, March 12, 2008

Kirkwood Spring Fling - May 17th


Come out and see us at the Kirkwood Spring Fling on May 17th! We always have a lot of fun at this festival, and there are tons of great crafters as well! Mark your calenders now, and don't miss out! They also have a tour of homes, which is really neat. Check out the website for more information! The festival is located in Bessie Branham Park, in the heart of Kirkwood.

Monday, March 10, 2008

It's March?

I haven't been updating much lately, as I've been sick with the flu/sinus infection/crud that everyone else around here seems to have. I missed 3 days of work, went back to work while sick, and am still not feeling altogether myself. Seems like it's been months since I've actually felt well! Oh well, what do you do? Keep plugging along. Anyway, I just recently realized that it's March already, and time to start planning on Spring/Summer festivals and events. I need to get on the ball! Katie and I have pretty much decided that we're basically going to stick to Farmer's Markets and smaller markets this year. We seem to have much better luck with sales at smaller venues. I'm not sure why that is, but of all the shows we did last year, we had the greatest sales at the Northside Drive Farmer's Market. It was pretty exciting. So, stay tuned for where you can find us in the upcoming months. I'll be updating as I find out where we'll be!

Katie Knits! Over the last several months, Katie has taught herself how to knit, and she's doing great! There are new knit items up in the shop, and here's a preview:


Aren't they cute? There's more to come, as she's knitting up a storm.
Embroidery Update: I'm ashamed to say that I haven't even taken my new embroidery machine out of the box yet! With being sick, and the house being in total disarray, I just haven't gotten around to it yet. But I do have lots of plans of what to do with it once I actually get it out and play with it. I've found some wonderful resources online and am getting all sorts of cool designs and ideas! Stay tuned...